Updating a single record
At this time, you are only able to update one record at a time in Metadata Hopper. In addition, the updated record should have the same basic metadata structure as the record you are replacing. So you would be ok replacing this metadata file:
<metadata>
	<title>My title</title>
	<local_id>1234.56</local_id>
	<subject>Education</subject>
</metadata>
With this new file:
<metadata>
	<title>My new title</title>
	<local_id>1234.56</local_id>
	<subject>Education</subject>
</metadata>
However you could not replace the original file with this one:
<metadata>
	<title_of_work>My new title</title_of_work>
	<id>1234.56</id>
	<subject>Education</subject>
</metadata>
This is because elements have changed and therefore the previous mappings you have created will not work.
To access the update record option, you must first be on the object record page for the object you want to update. For how to access the object record page, see the Viewing the object page section for more details.
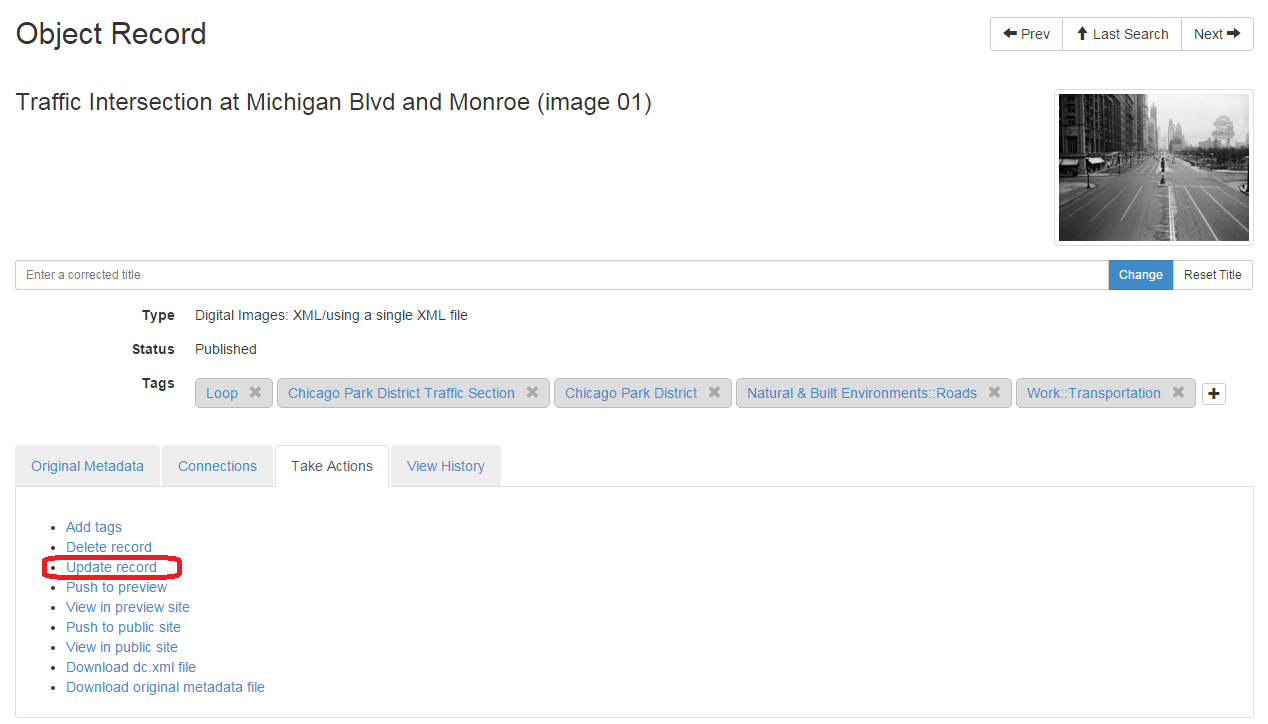
Once you have navigated to the object record page for the object you want to update, select the "Take Actions" tab. Underneath this tab, you find an option to "Update Record."
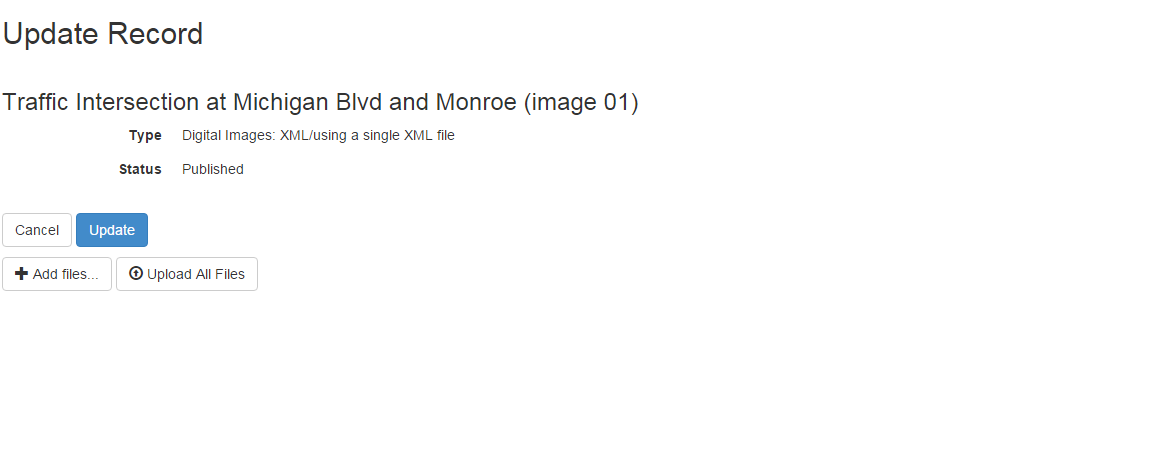
Clicking on this link will take you a screen that is similar to the deposit screen. Here you can select files using the "Add files" button and upload them using the "Upload all files" button. Please note that if you are updating a record that has an associated media file (for example, an image file), you will need to upload both the media file and the metadata file to update the record, even if one hasn't changed. If you upload only one, your update will be rejected.
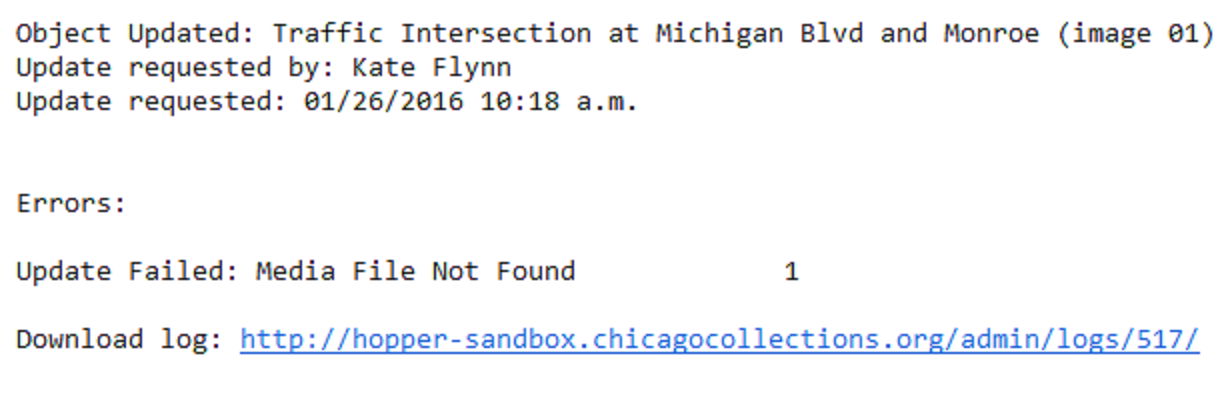
Once you have uploaded the new file(s), select the update button to complete the update. You will then receive an email notification when your update has been processed. This email will contain information on whether or not your update has been completed successfully. If your update was rejected, it will contain a link to an error log with more information on why this occured.